
| 일 | 월 | 화 | 수 | 목 | 금 | 토 |
|---|---|---|---|---|---|---|
| 1 | 2 | 3 | 4 | 5 | 6 | |
| 7 | 8 | 9 | 10 | 11 | 12 | 13 |
| 14 | 15 | 16 | 17 | 18 | 19 | 20 |
| 21 | 22 | 23 | 24 | 25 | 26 | 27 |
| 28 | 29 | 30 |
| Test (0) | 2010.04.27 |
|---|---|
| test (0) | 2010.04.26 |
| wiki wiki wikikiki (0) | 2010.02.09 |
| Postgres & mediawiki (0) | 2010.01.11 |
| Tomcat Admin App Deploy (0) | 2009.03.31 |
| Tistory & Twitter (0) | 2010.04.27 |
|---|---|
| test (0) | 2010.04.26 |
| wiki wiki wikikiki (0) | 2010.02.09 |
| Postgres & mediawiki (0) | 2010.01.11 |
| Tomcat Admin App Deploy (0) | 2009.03.31 |
| Tistory & Twitter (0) | 2010.04.27 |
|---|---|
| Test (0) | 2010.04.27 |
| wiki wiki wikikiki (0) | 2010.02.09 |
| Postgres & mediawiki (0) | 2010.01.11 |
| Tomcat Admin App Deploy (0) | 2009.03.31 |
| Test (0) | 2010.04.27 |
|---|---|
| test (0) | 2010.04.26 |
| Postgres & mediawiki (0) | 2010.01.11 |
| Tomcat Admin App Deploy (0) | 2009.03.31 |
| 체스와 포커의 차이 (0) | 2009.03.25 |
If you are using Postgres, you will need to either have a database and user created for you, or simply supply the name of a Postgres user with "superuser" privileges to the configuration form. Often, this is the database user named postgres.
The database that MediaWiki will use needs to have both plpgsql and tsearch2 installed. The installer script will try to install plpgsql, but you may need to install tsearch2 yourself. (tsearch2 is used for searching the text of your wiki). Here's one way to do most of the setup. This is for a Unix-like system, and assumes that you have already installed the plpgsql and tsearch2 modules. In this example, we'll create a database named wikidb, owned by a user named wikiuser. From the command-line, as the postgres user, perform the following steps.
 createuser -S -D -R -P -E wikiuser (then enter the password)
 createdb -O wikiuser wikidb
 createlang plpgsql wikidb
NOTE If you're using PostgreSQL 8.3.x, you don't need to perform the following steps to install tsearch2 since it has been integrated into the core.
Adding tsearch2 to the database is not a simple step, but hopefully it will already be done for you by whatever packaging process installed the tsearch2 module. In any case, the installer will let you know right away if it cannot find tsearch2.
The above steps are not all necessary, as the installer will try and do some of them for you if supplied with a superuser name and password.
For installing tsearch2 to the wikidb database under Windows, do the following steps:
That's it!
Point (2) seems only to work on windows, cause on debian linux 4.0 (etch) only user postgres is allowed to use language c. so there it must be called by:
su - postgres -c psql wikidb < tsearch2.sql
Afterwards you must grant select rights to wikiuser to the tsearch tables and insert the correct locale.
su - postgres
psql -d wikidb -c "grant select on pg_ts_cfg to wikiuser;"
psql -d wikidb -c "grant select on pg_ts_cfgmap to wikiuser;"
psql -d wikidb -c "grant select on pg_ts_dict to wikiuser;"
psql -d wikidb -c "grant select on pg_ts_parser to wikiuser;"
psql -d wikidb -c "update pg_ts_cfg set locale = current_setting('lc_collate') where ts_name = 'default' and prs_name='default';"
If you receive an error similar to "ERROR: relation "pg_ts_cfg" does not exist" when executing the above statements, try installing tsearch2 to the wikidb database again, but instead use these two separate steps (and then try the grant statements again):
1) su - postgres
2) psql wikidb -f tsearch2.sql
su - postgres
psql -d wikidb -c "grant select on pg_ts_config to wikiuser;"
psql -d wikidb -c "grant select on pg_ts_config_map to wikiuser;"
psql -d wikidb -c "grant select on pg_ts_dict to wikiuser;"
psql -d wikidb -c "grant select on pg_ts_parser to wikiuser;"
Once all of the above steps are complete, you can complete the installation through web browser by following instructions mentioned there on Manual:Config script page.
| test (0) | 2010.04.26 |
|---|---|
| wiki wiki wikikiki (0) | 2010.02.09 |
| Tomcat Admin App Deploy (0) | 2009.03.31 |
| 체스와 포커의 차이 (0) | 2009.03.25 |
| test (0) | 2008.09.17 |
5.x대로 버전이 올라오면서 웹어플리케이션(webapps)폴더를 설정하는 방법 (server.xml에 context를 추가하는)이
변경이 되어 삽질삽질을 하다가 5.x대에서부턴 admin으로 관리하라는 글을 보고 일단 admin 설정방법을 찾았다
톰캣설치후 http://localhost:8080/admin 으로 들어가면 어드민 패키지는 기본으로 설치되지 않는다는 안내문구를
볼 수 있다. 따로 어드민 '패키지'를 받아야 된다는 설명을 볼 수 있다.
패키지라고 되어 있지만 실제론 톰캣 설치구조와 유사한 파일과 디렉토리 구조를 가진 압축파일이다. 이 파일을 풀어서 현재 톰캣이 설치된 폴더와 비교해서 해당위치에 파일을 복사해 주면 되는데,
C:\Tomcat 5.5\conf\Catalina\localhost\ 에 압축을 풀면 나오는 동일한 구조의 디렉토리경로(conf\Catalina\localhost\)에 있는 admin.xml 파일과
C:\Tomcat 5.5\server\webapps\admin 에 압축푼 파일의 디렉토리 아래 \server\webapps\admin\*.*를 통째로 복사해준다.
그리고 나서 톰캣을 재구동하고 /admin으로 접속하면 아래와 같은 화면이 뜬다


2007/12/27 22:21
![]() http://blog.naver.com/kthfila01/45701460
http://blog.naver.com/kthfila01/45701460
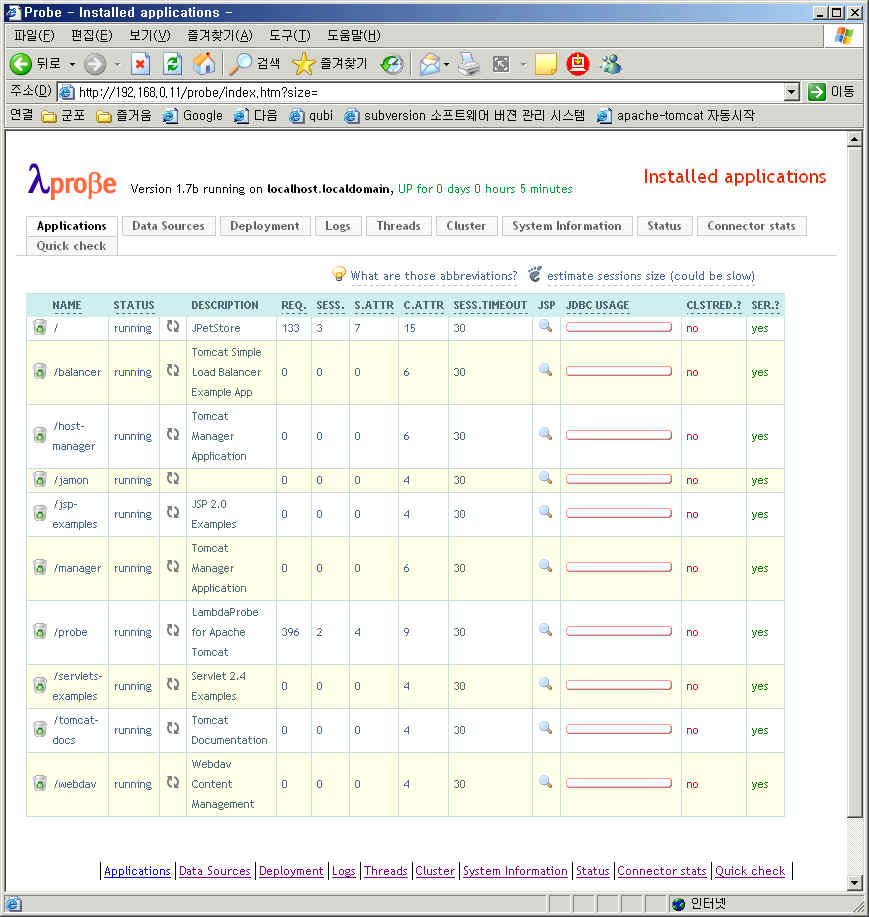
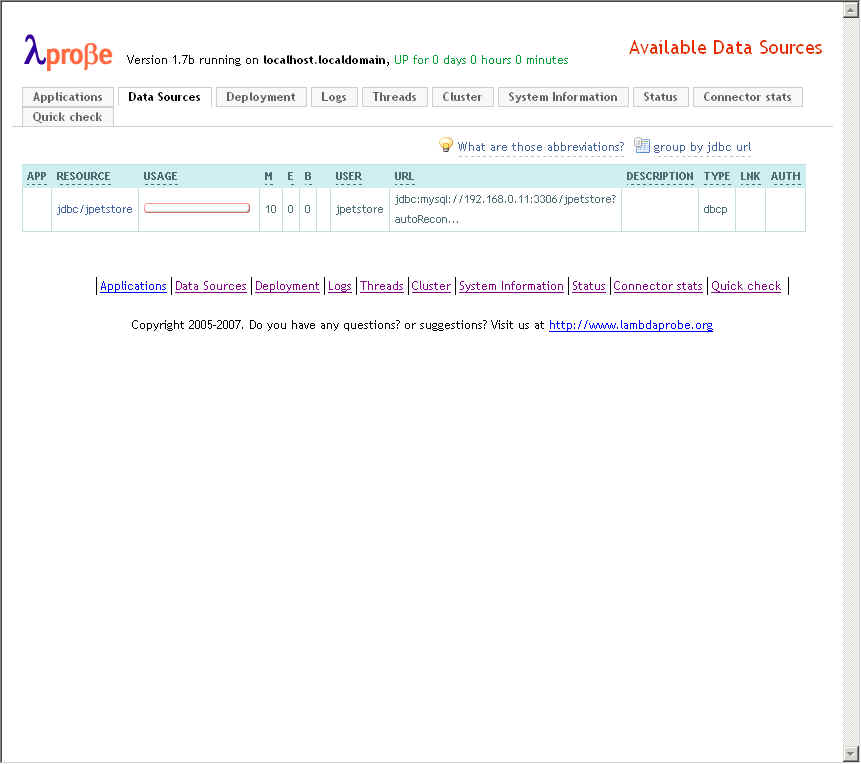
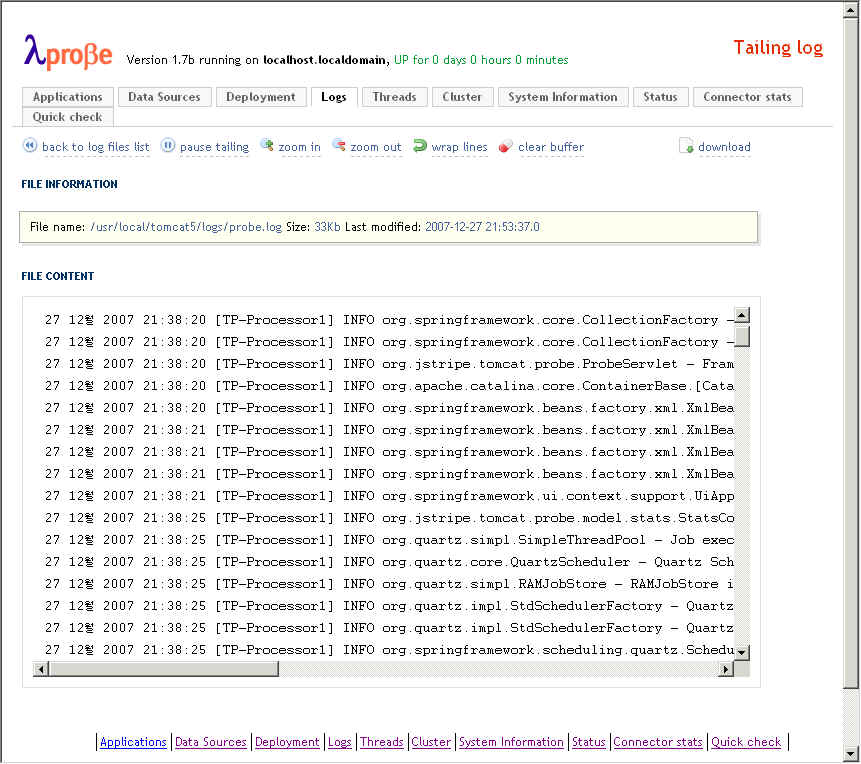
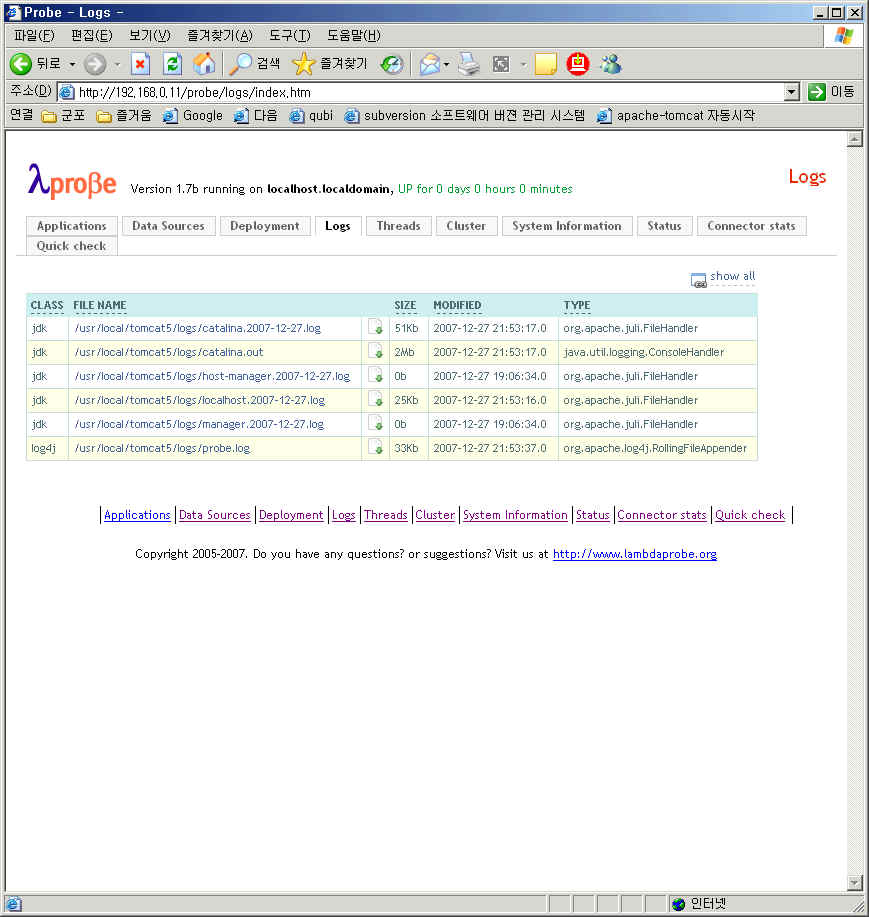
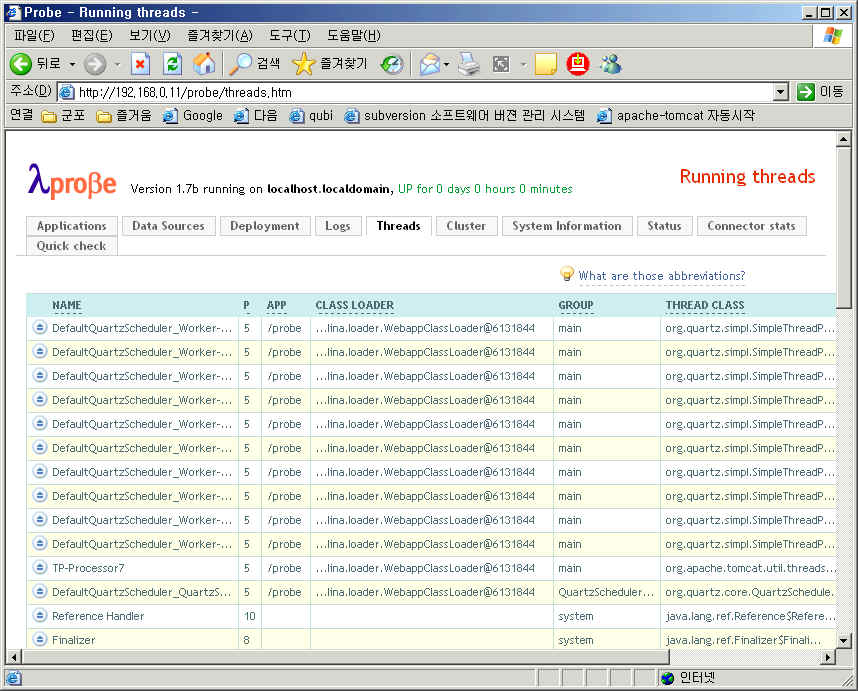
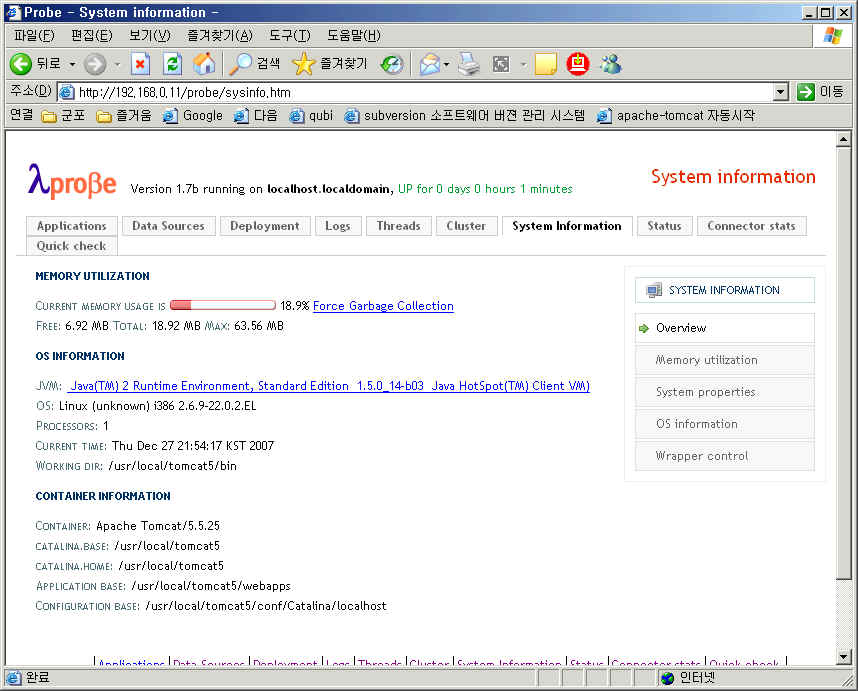
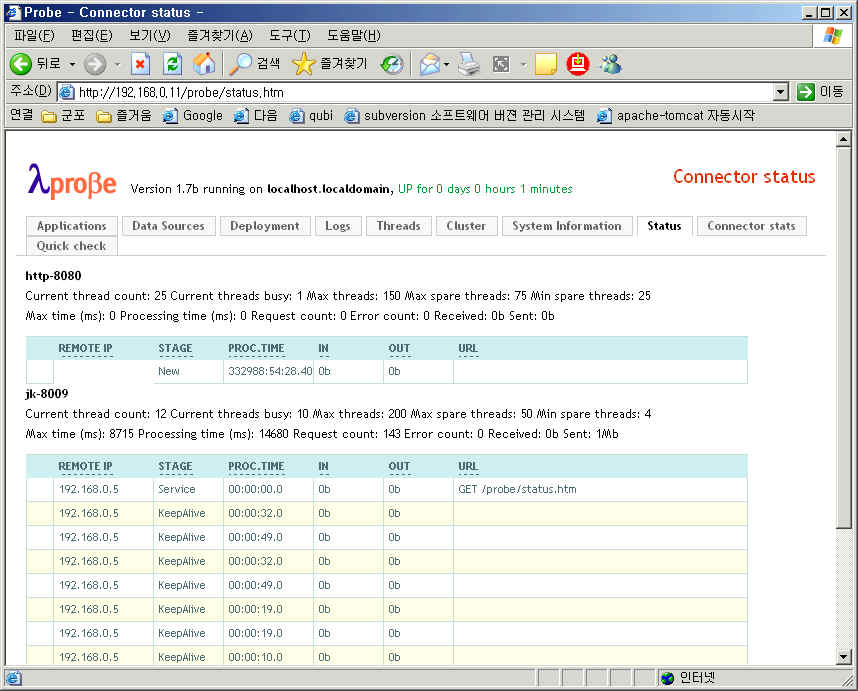
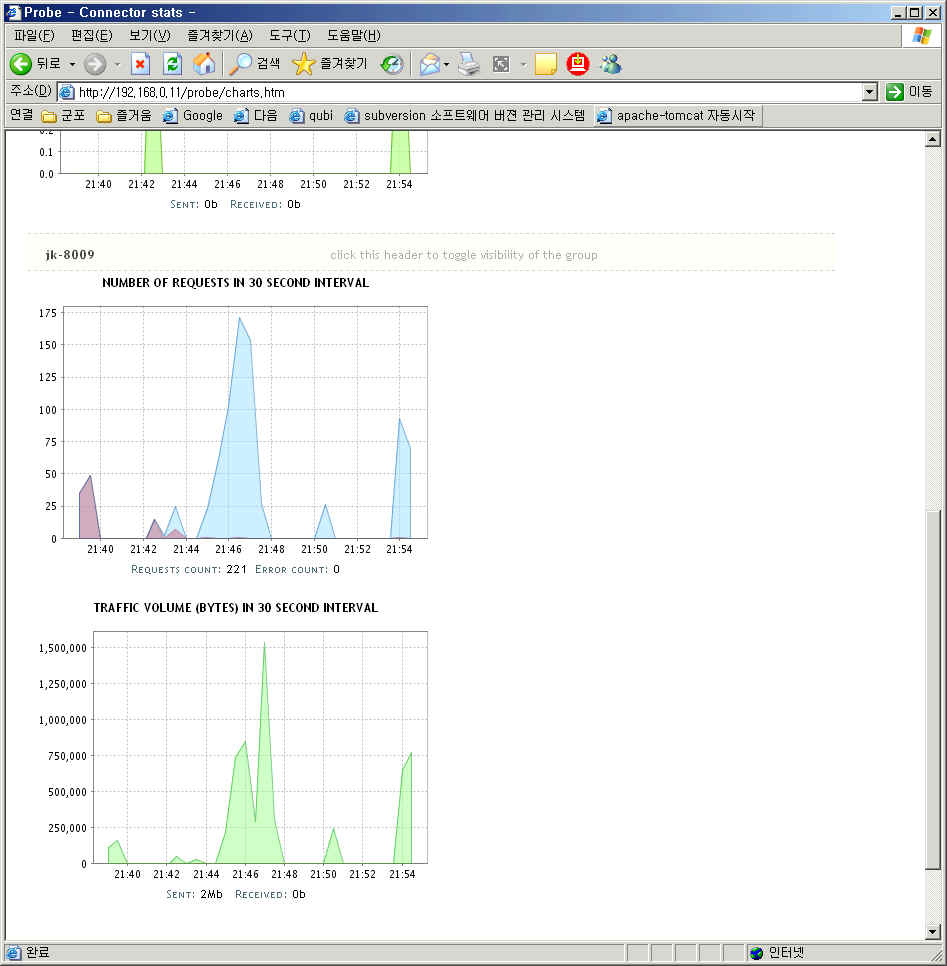
설치사항
-linux
-apache2.x
-tomcat 5.x
-jdk 1.5.x
-mysql 4.x
참조 : http://www.lambdaprobe.org/d/installation.shtml#tomcat
1. 참조에서 Installing manually 형식으로 설치했다.
{TOMCAT_HOME}/webapps/에 probe.war파일을 복사하고
2.{TOMCAT_HOME}/conf/tomcat-users.xml파일에 아래의 내용을 추가했다.
<user username="manager" password="manager" roles="manager"/>
<user username="poweruser" password="poweruser" roles="poweruser"/>
<user username="poweruserplus" password="poweruserplus" roles="poweruserplus"/>
<user username="probeuser" password="probeuser" roles="probeuser"/>
2. tomcat를 restart했다.
3. http://localhost/probe 로 접속후 manager /manager 로 접속했다.
-Dcom.sun.management.jmxremote JVM 모니터링을 위해서 JVM Option을 설정해야한다.
| wiki wiki wikikiki (0) | 2010.02.09 |
|---|---|
| Postgres & mediawiki (0) | 2010.01.11 |
| 체스와 포커의 차이 (0) | 2009.03.25 |
| test (0) | 2008.09.17 |
| [펌]펀드, 분산투자의 마법 (0) | 2007.11.26 |
| 체스 | 포커 |
| ㆍ몇 단계 앞을 내다보고 계획을세워야 한다. ㆍ자신의 자원이 명백히 드러나 있다. ㆍ경쟁자의 자원을 잘 알 수 있다. ㆍ게임을 하는 도중에 새로운 정보가 도착하지 않는다. |
ㆍ새로운 정보의 도착에 따라 적응하고 적용해야 한다. ㆍ시간이 지남에 따라 자원이 드러난다. ㆍ경쟁자의 자원이 시간이 지남에 따 라 드러난다. ㆍ새로운 정보가 정기적으로 도착한다. |
| Postgres & mediawiki (0) | 2010.01.11 |
|---|---|
| Tomcat Admin App Deploy (0) | 2009.03.31 |
| test (0) | 2008.09.17 |
| [펌]펀드, 분산투자의 마법 (0) | 2007.11.26 |
| [keytool 사용법] (0) | 2007.07.26 |
New in this release of Coherence*Web is a deployment option on the WebLogic Server platform that enables a tighter integration with WebLogic Server. The installation and configuration options described here only apply to WebLogic Server 10.3 deployments. It should be noted that the configuration of Coherence*Web for WebLogic Server is likely to change in future releases as Coherence*Web is even more tightly integrated into the WebLogic Server.
Coherence*Web is not a replacement for WebLogic Server's in-memory HTTP state replication services. However, Coherence*Web should be considered when an application has large Http Session State objects, when running into memory constraints due to storing Http Session object data, and/or have existing Coherence Cluster and would like to offload Http Session storage to a Coherence Cluster.
The most significant change introduced by this new deployment option is that applications deployed using the Coherence*Web SPI module no longer require an application to be instrumented by the Coherence*Web WebInstaller.
The Weblogic Server Coherence*Web SPI consists of the coherence-web-spi.war file, located in the coherence\lib directory in the Coherence distribution. The coherence.jar file, located in the same directory, is also necessary for enabling Coherence*Web functionality in WebLogic Server.
The Coherence*Web SPI for Weblogic Server requires that a load balancer which enforces http session JVM affinity is running in front of the WebLogic Server tier. WebLogic Server ships with several different proxy plug-ins which will enforce JVM session stickiness. Documentation for configuring the WebLogic Server proxy plug-in is available here.
The Coherence*Web distribution includes a deployable shared library that contains a native plugin to WebLogic Server's Http Session Management interface. To enable Coherence*Web on WebLogic Server for a web application, you must complete the following steps:


| If you are deploying Coherence*Web in a WebLogic Portal environment please see the Coherence*Web and WebLogic Portal page for installation instructions. |
There are two differences between the default cache configuration for the Coherence*Web SPI for WebLogic Server and Coherence*Web:
The Coherence caches used by the Coherence*Web SPI is configured by the session-cache-config.xml file. The session-cache-config.xml file is located inside the coherence-web-spi.war file under the WEB-INF\classes directory. Any cache configuration change should be put inside session-cache-config.xml, and then should be repackaged inside coherence-web-spi.war.
A Cache Server JVM is a dedicated Coherence JVM that is responsible for storing and managing all cached data (in this case, HttpSession state). One or more Cache Server JVMs must be started before the WLS/WLP JVMs can be started.
As part of the Coherence*Web SPI for WebLogic Server you will find the coherence.jar and coherence-web-spi.war located in the /lib directory of the Coherence 3.4.2 distribution.
Coherence cluster nodes are class loader scoped. Therefore, controlling the number of unique Coherence cluster nodes in a Coherence*Web deployment needs to be decided prior to packaging the application(s). The different options are listed below and are described in detail on the Cluster Node Isolation in Coherence*Web page:
| Be Careful The Application Server Scoped Cluster Nodes configuration should be considered very carefully and never used in environments where application interaction is unknown or unpredictable.
|
<weblogic-web-app>

	...

 	<library-ref>

 		<library-name>coherence-web-spi</library-name>

		<specification-version>1.0.0.0</specification-version>

        	<implementation-version>1.0.0.0</implementation-version>

		<exact-match>false</exact-match>

	</library-ref>

	...


</weblogic-web-app>
<weblogic-web-app>

	...

 	<library-ref>

 		<library-name>coherence-web-spi</library-name>

		<specification-version>1.0.0.0</specification-version>

		<implementation-version>1.0.0.0</implementation-version>

		<exact-match>false</exact-match>

	</library-ref>

	...

</weblogic-web-app>
<weblogic-web-app>

	...

 	<library-ref>

 		<library-name>coherence-web-spi</library-name>

		<specification-version>1.0.0.0</specification-version>

		<implementation-version>1.0.0.0</implementation-version>

		<exact-match>false</exact-match>

	</library-ref>

	...

<weblogic-web-app>
Since Coherence*Web is in control of the http session lifecycle, most data from the <session-descriptor> element in either weblogic.xml or weblogic-application.xml is ignored. Most of Coherence*Web configuration can be done through <context-param> in web.xml. The default configuration included in the SPI should be sufficient for most web application usages, but all configurations options can be overidden using <context-param>.
The following Coherence*Web settings can be configured in web.xml using <context-param>:

Please see the Configuring Coherence*Web page for detailed information on each of the above parameters.
The generated Http session cookie can be configured in weblogic.xml or weblogic-application.xml using <session-descriptor>:
In WebLogic SPI module the following Coherence Web Configuration parameters are not controlled by the Coherence Web Configuration parameters and will need to be specified as outlined below instead:
By default, WebLogic Server provides basic SSO functionality. To leverage SAML SSO functionality with Coherence*Web, the saml2.war web application must be modified.
<?xml version="1.0" encoding="UTF-8"?>

	<web-app>..

	<context-param>

		<param-name>coherence-web-sessions-enabled</param-name>

		<param-value>true</param-value>

	</context-param>

	...

	</web-app>
jar cvf saml2.war $tempdir
By default, Coherence*Web creates a single HTTP session across all web applications for each client and scopes the session attributes to a each web application. This means that if a session is invalidated in one web application, that same session is invalidated for all web applications in WebLogic Server using Coherence*Web.
This functionality requires that the session cookie path is set to "/", making the same session cookie available to all web applications. If this is not the desired behavior, a potential workaround is to reduce the scope the session cookie by adding the following entry to weblogic.xml in each web application:
<weblogic-web-app>

	...

	<session-descriptor>

		<cookie-path>[path of web-app context, for example "/mainApp/subApp"]</cookie-path>

	</session-descriptor>

	...

</weblogic-web-app>
This will ensure a unique session is created for each web application. It is also possible to scope the session to all web-applications within an EAR file by setting the session cookie path to the context root of the deployed EAR.
This workaround around will not work if you deploy an EAR or web-application with '/' as the context path, or if you require WebLogic Single Sign-On. WebLogic Single Sign-On requires that the session cookie path be set to '/'.
| Using REST with Oracle Service Bus (0) | 2009.03.09 |
|---|---|
| Monitoring WebLogic using JMX (0) | 2009.03.05 |
| WLS 9/10 에서 JMX MBean 브라우저 jconsole 사용하기 (0) | 2009.03.04 |
| Installing and Displaying the WLDF Console Extension (0) | 2009.03.04 |
| Enable trust between domains (0) | 2008.03.29 |
Taxonomy of BPEL Faults
A bpel fault has a fault name, which is a qname (name qualified with a namespace), and a possible messageType. There are two categories of faults in BPEL: business faults and runtime faults.
Business faults are application specific faults and occur when an explicit <throw> activity is executed or an <invoke> activity gets a fault as response. The fault name of a business fault is specified by the BPEL process and the messageType, if one exists, is defined in the WSDL.
Runtime faults are not user defined and will not appear in the WSDL for a process or service. The BPEL spec defines 11 standard faults: selectionFailure, conflictingReceive, conflictingRequest, mismatchedAssignmentFailure, joinFailure, forcedTermination, correlationViolation, uninitializedVariable, repeatedCompensation and invalidReply. They are all in the namespace "http://schemas.xmlsoap.org/ws/2003/03/business-process/" and are typeless, meaning they don't have associated messageTypes. The Oracle BPEL Process Manager also introduces two more runtime faults: bindingFault and remoteFault. They are in the namespace of "http://schemas.oracle.com/extension" and are associated with an Oracle defined messageType "RuntimeFaultMessage". The WSDL that defines the RuntimeFaultMessage messageType is available in the c:/orabpel/system/xmllib directory.
RemoteFault is retryable. It has the following possible fault codes
| FaultCode | Reason |
| ConnectionRefused | The remote server is not up |
| WSDLReadingError | Fail to read WSDL |
| GenericRemoteFault | Generic remote fault |
BindingFault is not retryable. It has the following possible fault codes:
| FaultCode | Reason |
| VersionMismatch | The processing party found an invalid namespace for the SOAP Envelope element |
| MustUnderstand | An immediate child element of the SOAP Header element that was either not understood or not obeyed by the processing party contained a SOAP mustUnderstand attribute with a value of "1" |
| Client.GenericError | Generic error at client side |
| Client.WrongNumberOfInputParts | input message part number mismatch |
| Client.WrongNumberOfOutputParts | output message part number mismatch |
| Client.WrongTypeOfInputPart | input message part type error |
| Client.WrongTypeOfOutputPart | output message part type error |
| Server.GenericError | Generic error at server side |
| Server.NoService | Server is up but no service |
| Server.NoHTTPSOAPAction | Request is missing HTTP SOAP Action |
| Server.Unauthenticated | Request is not authenticated |
| Server.Unauthorized | Request is not authorized |
| Securing Oracle Service Bus with Oracle Web Services Manager (0) | 2009.03.11 |
|---|---|
| Working with Split-Join (1) | 2009.03.11 |
| Configuring Business Services using the HTTP Transport (0) | 2009.03.11 |
| Integrating PeopleSoft Integration Broker and Oracle Service Bus (0) | 2009.03.11 |
| Integrating PeopleSoft HCM with BPA Suite and SOA Suite (0) | 2009.03.11 |
You can use Oracle Web Services Manager 10.1.3.x and later in conjunction with Oracle Service Bus to help secure your SOA environment.
This document provides use cases that highlight the interaction between Oracle Service Bus and Oracle Web Services Manager features in providing security throughout the service pipeline.
No configuration in Oracle Service Bus is required for interaction with Oracle Web Services Manager. You implement Oracle Web Services Manager features at the desired client and service locations, and the interaction and enforcement occurs automatically.
For more information about Oracle Web Services Manager, see http://www.oracle.com/appserver/Web-services-manager.html.
This document describes the following security use cases with Oracle Web Services Manager:
Figure 11-1 illustrates using Oracle Web Services Manager Gateway for enforcing perimeter security.

Oracle Web Services Manager Gateway virtualizes the service exposed by the Oracle Service Bus proxy service. The inbound request to the Oracle Web Services Manager Gateway has a message protection policy. The client sends a secure request to the Oracle Web Services Manager Gateway virtualized service, which is signed and encrypted.
The Oracle Web Services Manager Gateway acts as a security enforcement point and decrypts and verifies the signature. Oracle Web Services Manager Gateway then routes the plain request to the proxy service over SSL. The proxy service forwards the request to the business service, which invokes the Web service and gets the plain response back. The response moves back through the proxy service and Oracle Web Services Manager Gateway to the client.
Figure 11-2 illustrates using the Oracle Web Services Manager Gateway for identity propagation using SAML (Security Assertion Markup Language) token version 1.1.

The client sends a basic HTTP authentication request to the Oracle Web Services Manager Gateway. Oracle Web Services Manager Gateway authenticates the user using the user name and password from the HTTP header. Oracle Web Services Manager Gateway generates a SAML sender voucher assertion with the authenticated user identity (token mediation), inserts the SAML token, and sends the assertion to the proxy service. The proxy service receives the SAML assertion with the user identity and, acting as an active intermediary, verifies the user identity. The proxy service then passes the request to the business service. The response travels back through the business service, proxy service, and Oracle Web Services Manager Gateway to the client.
This section describes the following use cases:
Figure 11-3 illustrates using the Oracle Web Services Manager Client Agent for message protection.

The proxy service has an inbound message protection policy. The Oracle Web Services Manager Client Agent sends a signed and encrypted request to the proxy service. The proxy service receives the secured request and, acting as an active intermediary, decrypts and verifies signature and routes the request to the business service. The business service invokes the Web service, gets the response back, and sends it to the proxy service. The proxy service signs and encrypts the response and sends it to the Oracle Web Services Manager Client Agent. The Client Agent receives the secure response, decrypts and verifies the signature, and passes the response to the client.

The client sends a plain request through the proxy and business services in Oracle Service Bus. The business service signs and encrypts the request and sends the message to the Oracle Web Services Manager Gateway. The Gateway decrypts and verifies the request. The plain message response is passed back to the client.

The client sends a plain request through the proxy and business services in Oracle Service Bus. The business service signs and encrypt the request and sends the message to the Oracle Web Services Manager Server Agent. The Server Agent decrypts and verifies the request. The plain message response is passed back to the client.

The Oracle Web Services Manager Client Agent signs and encrypts a client request and sends the request through the proxy and business services to the Web service. The Web service has a Server Agent injected in it. The Server Agent has an inbound message protection policy that decrypts and verifies the signature, then signs and encrypts the response. The response is sent back to the Client Agent, which decrypts and verifies the response, then returns the plain request to the client.
Figure 11-7 illustrates using the Oracle Web Services Manager Client Agent for authentication.

The proxy service has a user name token policy. The client, through Oracle Web Services Manager Client Agent, sends a request to the proxy service with user credentials at the message level in a user name token. The proxy service maps the user credential from the user name token using credential mapping and sends it through the business service to the Web service for authentication. The Web service is protected using an Oracle Web Services Manager service agent with an inbound user name token policy. The Oracle Web Services Manager Service Client Agent extracts and authenticates the user credentials. The response is then sent back through the business service and the proxy service to the client.
| Taxonomy of BPEL Faults (0) | 2009.03.13 |
|---|---|
| Working with Split-Join (1) | 2009.03.11 |
| Configuring Business Services using the HTTP Transport (0) | 2009.03.11 |
| Integrating PeopleSoft Integration Broker and Oracle Service Bus (0) | 2009.03.11 |
| Integrating PeopleSoft HCM with BPA Suite and SOA Suite (0) | 2009.03.11 |
archidream's Blog is powered by Daum