
| 일 | 월 | 화 | 수 | 목 | 금 | 토 |
|---|---|---|---|---|---|---|
| 1 | 2 | 3 | ||||
| 4 | 5 | 6 | 7 | 8 | 9 | 10 |
| 11 | 12 | 13 | 14 | 15 | 16 | 17 |
| 18 | 19 | 20 | 21 | 22 | 23 | 24 |
| 25 | 26 | 27 | 28 | 29 | 30 | 31 |
| Test (0) | 2010.04.27 |
|---|---|
| test (0) | 2010.04.26 |
| wiki wiki wikikiki (0) | 2010.02.09 |
| Postgres & mediawiki (0) | 2010.01.11 |
| Tomcat Admin App Deploy (0) | 2009.03.31 |
| Tistory & Twitter (0) | 2010.04.27 |
|---|---|
| test (0) | 2010.04.26 |
| wiki wiki wikikiki (0) | 2010.02.09 |
| Postgres & mediawiki (0) | 2010.01.11 |
| Tomcat Admin App Deploy (0) | 2009.03.31 |
| Tistory & Twitter (0) | 2010.04.27 |
|---|---|
| Test (0) | 2010.04.27 |
| wiki wiki wikikiki (0) | 2010.02.09 |
| Postgres & mediawiki (0) | 2010.01.11 |
| Tomcat Admin App Deploy (0) | 2009.03.31 |
| Test (0) | 2010.04.27 |
|---|---|
| test (0) | 2010.04.26 |
| Postgres & mediawiki (0) | 2010.01.11 |
| Tomcat Admin App Deploy (0) | 2009.03.31 |
| 체스와 포커의 차이 (0) | 2009.03.25 |
If you are using Postgres, you will need to either have a database and user created for you, or simply supply the name of a Postgres user with "superuser" privileges to the configuration form. Often, this is the database user named postgres.
The database that MediaWiki will use needs to have both plpgsql and tsearch2 installed. The installer script will try to install plpgsql, but you may need to install tsearch2 yourself. (tsearch2 is used for searching the text of your wiki). Here's one way to do most of the setup. This is for a Unix-like system, and assumes that you have already installed the plpgsql and tsearch2 modules. In this example, we'll create a database named wikidb, owned by a user named wikiuser. From the command-line, as the postgres user, perform the following steps.
 createuser -S -D -R -P -E wikiuser (then enter the password)
 createdb -O wikiuser wikidb
 createlang plpgsql wikidb
NOTE If you're using PostgreSQL 8.3.x, you don't need to perform the following steps to install tsearch2 since it has been integrated into the core.
Adding tsearch2 to the database is not a simple step, but hopefully it will already be done for you by whatever packaging process installed the tsearch2 module. In any case, the installer will let you know right away if it cannot find tsearch2.
The above steps are not all necessary, as the installer will try and do some of them for you if supplied with a superuser name and password.
For installing tsearch2 to the wikidb database under Windows, do the following steps:
That's it!
Point (2) seems only to work on windows, cause on debian linux 4.0 (etch) only user postgres is allowed to use language c. so there it must be called by:
su - postgres -c psql wikidb < tsearch2.sql
Afterwards you must grant select rights to wikiuser to the tsearch tables and insert the correct locale.
su - postgres
psql -d wikidb -c "grant select on pg_ts_cfg to wikiuser;"
psql -d wikidb -c "grant select on pg_ts_cfgmap to wikiuser;"
psql -d wikidb -c "grant select on pg_ts_dict to wikiuser;"
psql -d wikidb -c "grant select on pg_ts_parser to wikiuser;"
psql -d wikidb -c "update pg_ts_cfg set locale = current_setting('lc_collate') where ts_name = 'default' and prs_name='default';"
If you receive an error similar to "ERROR: relation "pg_ts_cfg" does not exist" when executing the above statements, try installing tsearch2 to the wikidb database again, but instead use these two separate steps (and then try the grant statements again):
1) su - postgres
2) psql wikidb -f tsearch2.sql
su - postgres
psql -d wikidb -c "grant select on pg_ts_config to wikiuser;"
psql -d wikidb -c "grant select on pg_ts_config_map to wikiuser;"
psql -d wikidb -c "grant select on pg_ts_dict to wikiuser;"
psql -d wikidb -c "grant select on pg_ts_parser to wikiuser;"
Once all of the above steps are complete, you can complete the installation through web browser by following instructions mentioned there on Manual:Config script page.
| test (0) | 2010.04.26 |
|---|---|
| wiki wiki wikikiki (0) | 2010.02.09 |
| Tomcat Admin App Deploy (0) | 2009.03.31 |
| 체스와 포커의 차이 (0) | 2009.03.25 |
| test (0) | 2008.09.17 |
5.x대로 버전이 올라오면서 웹어플리케이션(webapps)폴더를 설정하는 방법 (server.xml에 context를 추가하는)이
변경이 되어 삽질삽질을 하다가 5.x대에서부턴 admin으로 관리하라는 글을 보고 일단 admin 설정방법을 찾았다
톰캣설치후 http://localhost:8080/admin 으로 들어가면 어드민 패키지는 기본으로 설치되지 않는다는 안내문구를
볼 수 있다. 따로 어드민 '패키지'를 받아야 된다는 설명을 볼 수 있다.
패키지라고 되어 있지만 실제론 톰캣 설치구조와 유사한 파일과 디렉토리 구조를 가진 압축파일이다. 이 파일을 풀어서 현재 톰캣이 설치된 폴더와 비교해서 해당위치에 파일을 복사해 주면 되는데,
C:\Tomcat 5.5\conf\Catalina\localhost\ 에 압축을 풀면 나오는 동일한 구조의 디렉토리경로(conf\Catalina\localhost\)에 있는 admin.xml 파일과
C:\Tomcat 5.5\server\webapps\admin 에 압축푼 파일의 디렉토리 아래 \server\webapps\admin\*.*를 통째로 복사해준다.
그리고 나서 톰캣을 재구동하고 /admin으로 접속하면 아래와 같은 화면이 뜬다


2007/12/27 22:21
![]() http://blog.naver.com/kthfila01/45701460
http://blog.naver.com/kthfila01/45701460
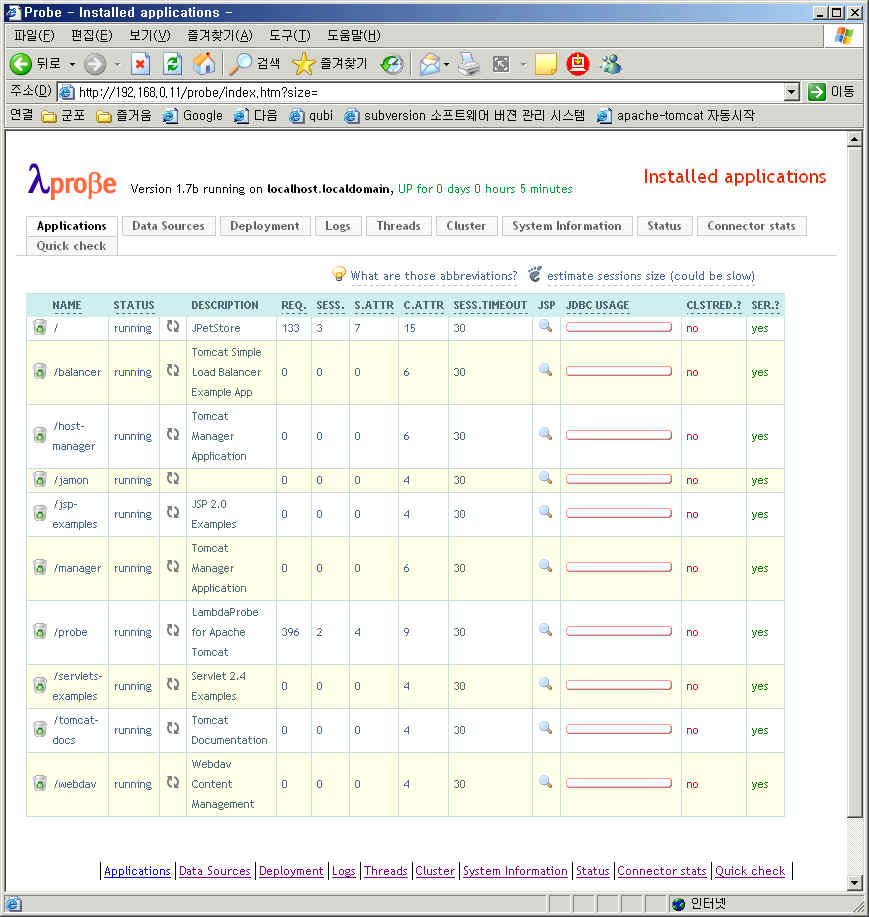
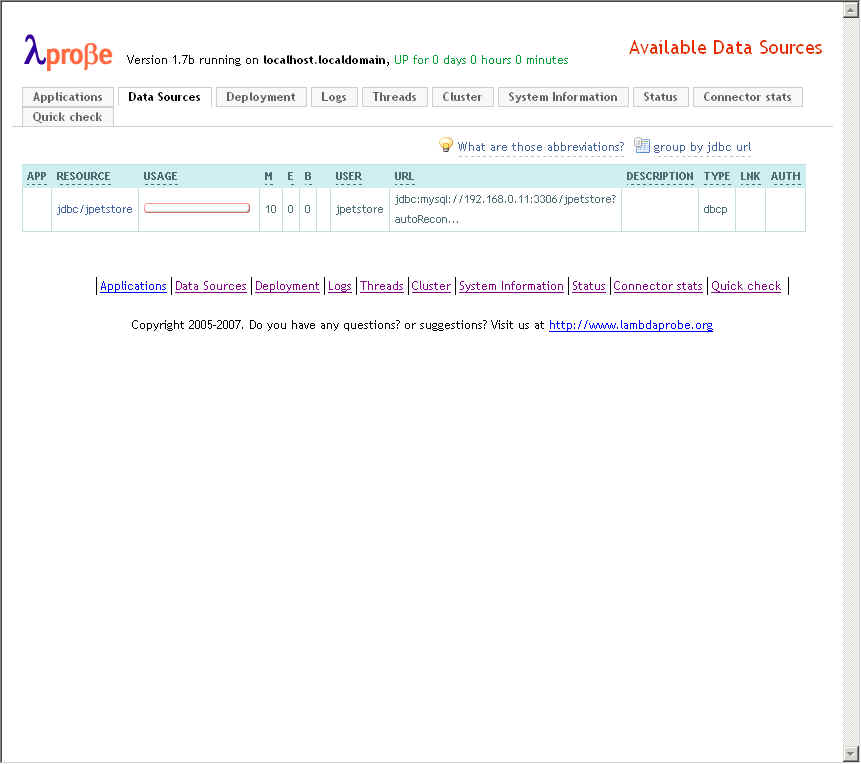
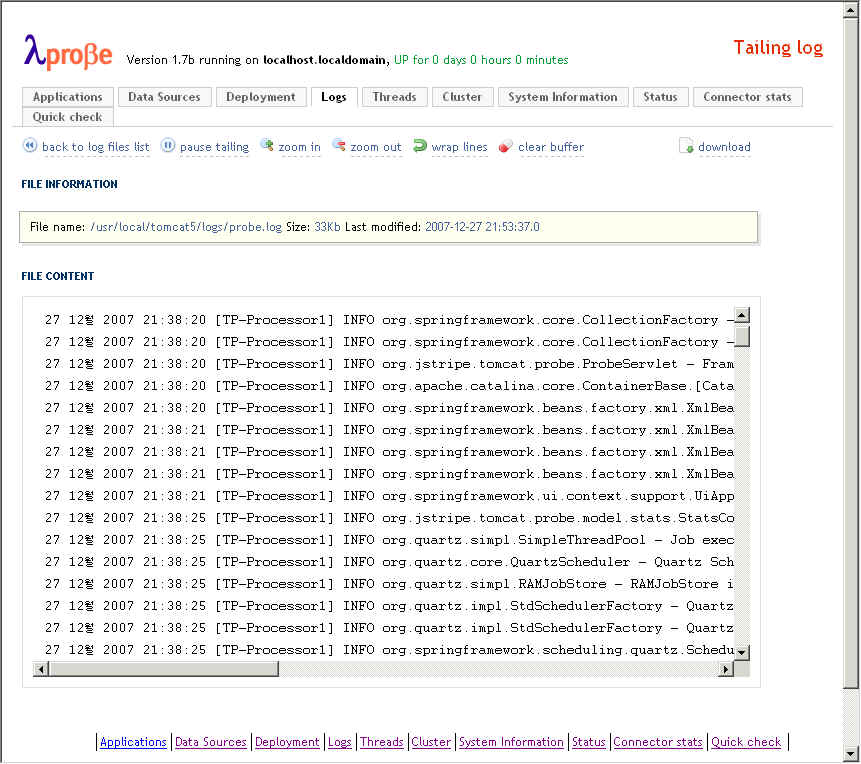
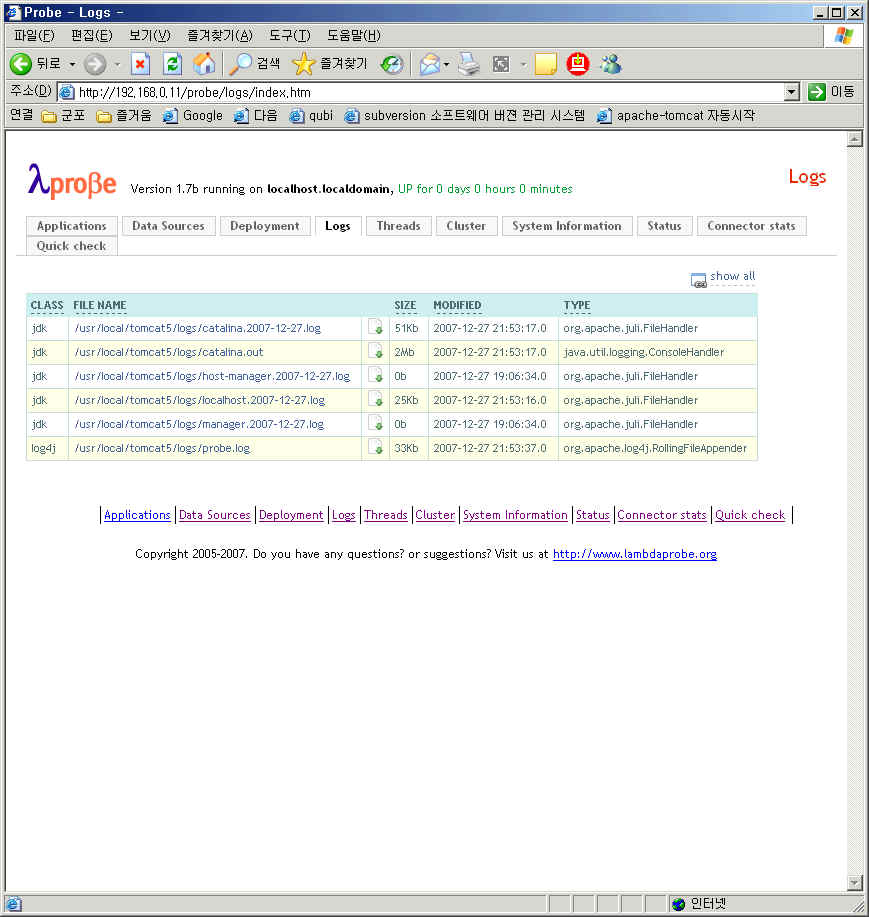
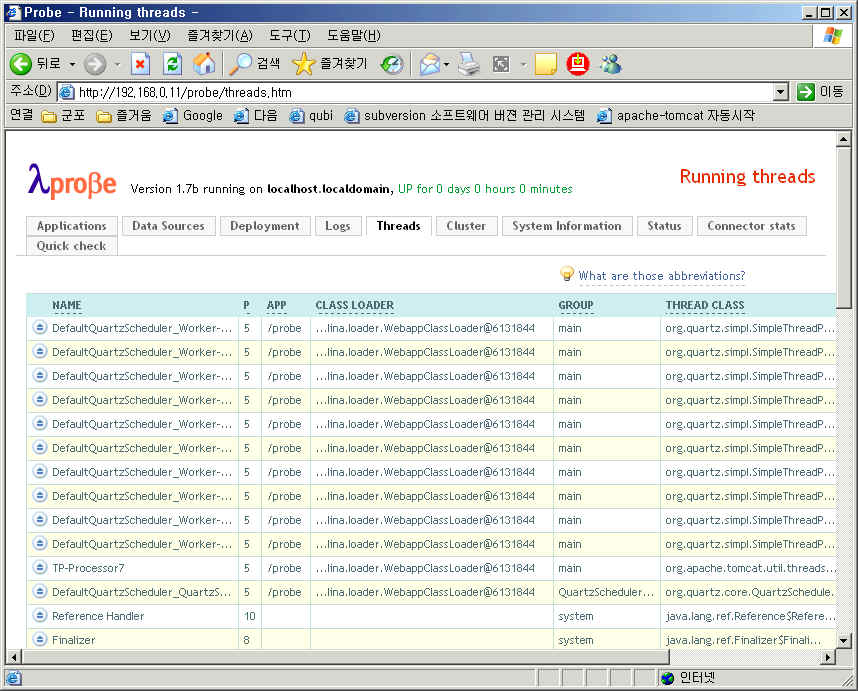
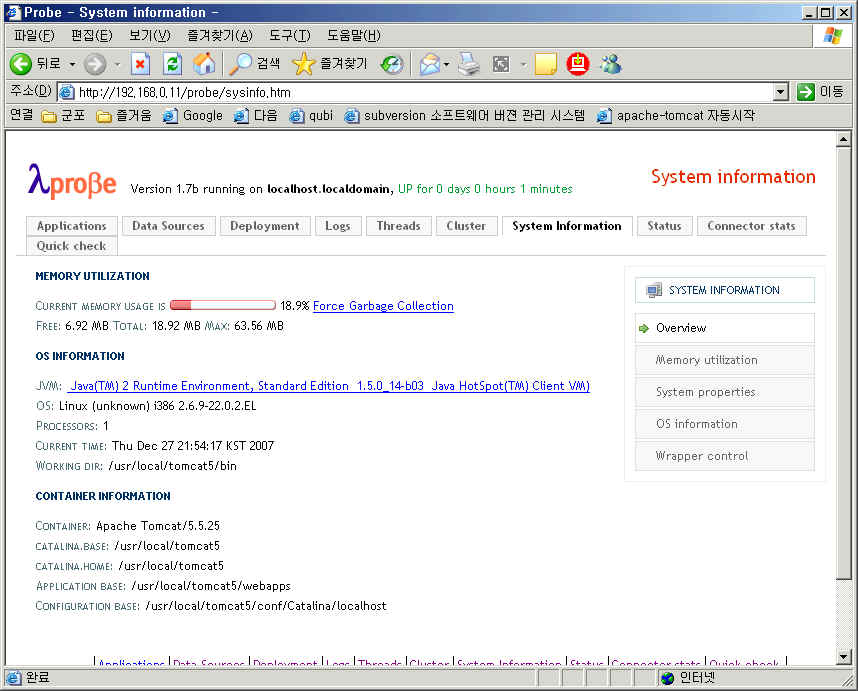
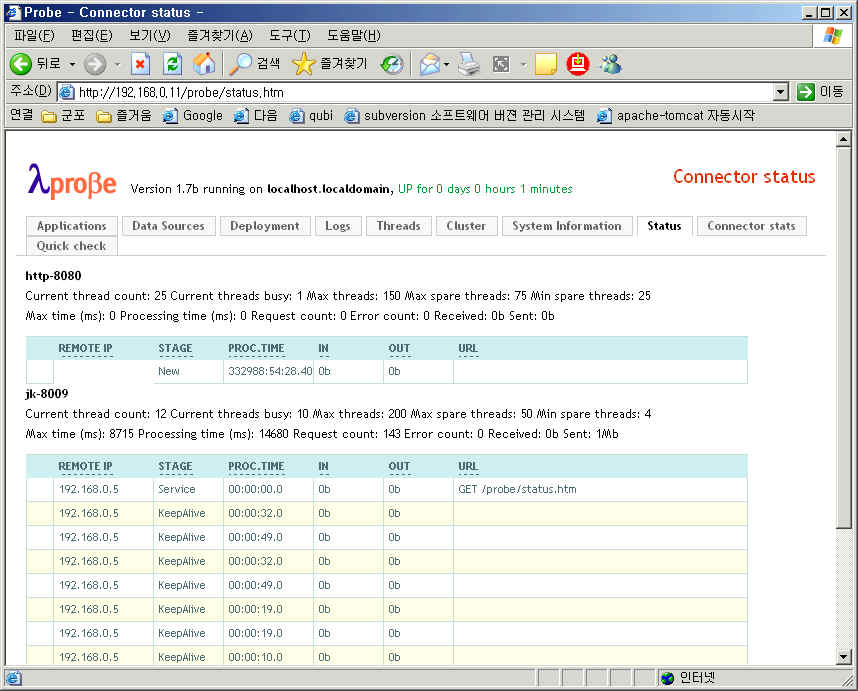
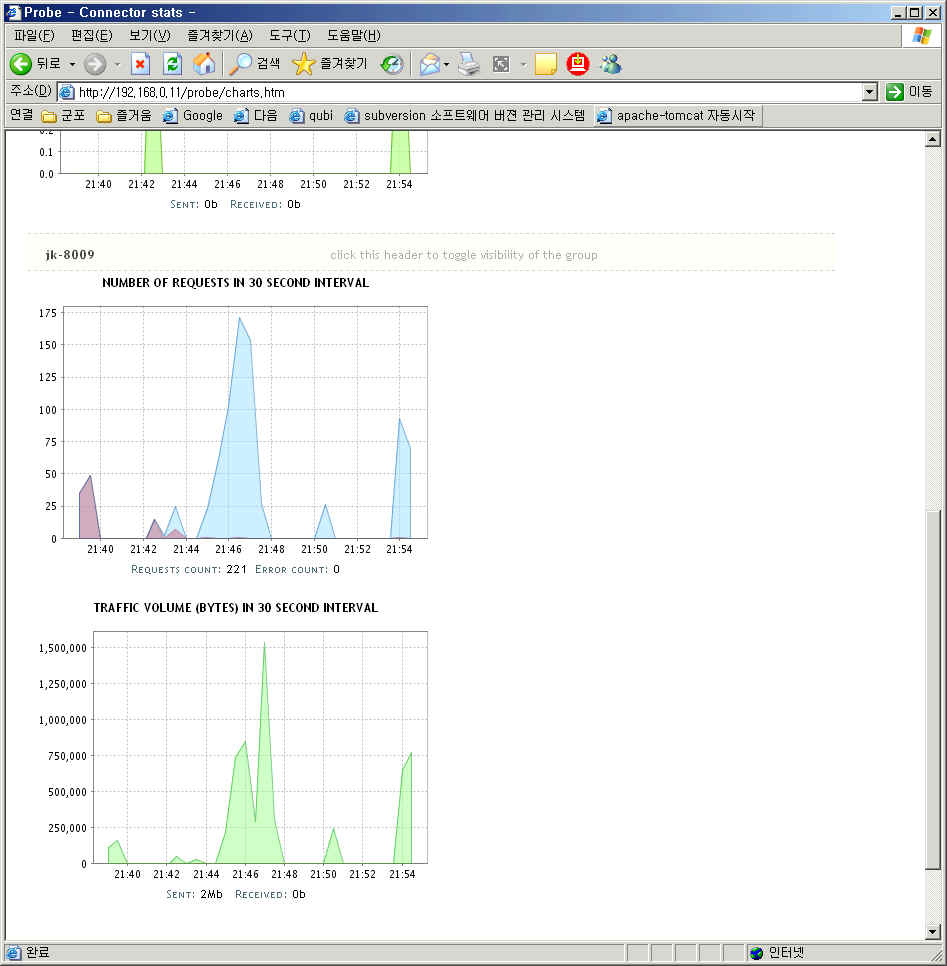
설치사항
-linux
-apache2.x
-tomcat 5.x
-jdk 1.5.x
-mysql 4.x
참조 : http://www.lambdaprobe.org/d/installation.shtml#tomcat
1. 참조에서 Installing manually 형식으로 설치했다.
{TOMCAT_HOME}/webapps/에 probe.war파일을 복사하고
2.{TOMCAT_HOME}/conf/tomcat-users.xml파일에 아래의 내용을 추가했다.
<user username="manager" password="manager" roles="manager"/>
<user username="poweruser" password="poweruser" roles="poweruser"/>
<user username="poweruserplus" password="poweruserplus" roles="poweruserplus"/>
<user username="probeuser" password="probeuser" roles="probeuser"/>
2. tomcat를 restart했다.
3. http://localhost/probe 로 접속후 manager /manager 로 접속했다.
-Dcom.sun.management.jmxremote JVM 모니터링을 위해서 JVM Option을 설정해야한다.
| wiki wiki wikikiki (0) | 2010.02.09 |
|---|---|
| Postgres & mediawiki (0) | 2010.01.11 |
| 체스와 포커의 차이 (0) | 2009.03.25 |
| test (0) | 2008.09.17 |
| [펌]펀드, 분산투자의 마법 (0) | 2007.11.26 |
| 체스 | 포커 |
| ㆍ몇 단계 앞을 내다보고 계획을세워야 한다. ㆍ자신의 자원이 명백히 드러나 있다. ㆍ경쟁자의 자원을 잘 알 수 있다. ㆍ게임을 하는 도중에 새로운 정보가 도착하지 않는다. |
ㆍ새로운 정보의 도착에 따라 적응하고 적용해야 한다. ㆍ시간이 지남에 따라 자원이 드러난다. ㆍ경쟁자의 자원이 시간이 지남에 따 라 드러난다. ㆍ새로운 정보가 정기적으로 도착한다. |
| Postgres & mediawiki (0) | 2010.01.11 |
|---|---|
| Tomcat Admin App Deploy (0) | 2009.03.31 |
| test (0) | 2008.09.17 |
| [펌]펀드, 분산투자의 마법 (0) | 2007.11.26 |
| [keytool 사용법] (0) | 2007.07.26 |
| Postgres & mediawiki (0) | 2010.01.11 |
|---|---|
| Tomcat Admin App Deploy (0) | 2009.03.31 |
| 체스와 포커의 차이 (0) | 2009.03.25 |
| [펌]펀드, 분산투자의 마법 (0) | 2007.11.26 |
| [keytool 사용법] (0) | 2007.07.26 |


| Postgres & mediawiki (0) | 2010.01.11 |
|---|---|
| Tomcat Admin App Deploy (0) | 2009.03.31 |
| 체스와 포커의 차이 (0) | 2009.03.25 |
| test (0) | 2008.09.17 |
| [keytool 사용법] (0) | 2007.07.26 |
keytool 사용법:
-certreq [-v] [-protected]
[-alias <별명>] [-sigalg <서명 알고리즘>]
[-file <csr 파일>] [-keypass <키 암호>]
[-keystore <keystore>] [-storepass <암호 입력>]
[-storetype <입력 유형>] [-providerName <이름>]
[-providerClass <공급자 클래스 이름> [-providerArg <인자>]] ...
-delete [-v] [-protected] -alias <별명>
[-keystore <keystore>] [-storepass <암호 입력>]
[-storetype <입력 유형>] [-providerName <이름>]
[-providerClass <공급자 클래스 이름> [-providerArg <인자>]] ...
-export [-v] [-rfc] [-protected]
[-alias <별명>] [-file <인증서 파일>]
[-keystore <keystore>] [-storepass <암호 입력>]
[-storetype <입력 유형>] [-providerName <이름>]
[-providerClass <공급자 클래스 이름> [-providerArg <인자>]] ...
-genkey [-v] [-protected]
[-alias <별명>]
[-keyalg <키 알고리즘>] [-keysize <키 크기>]
[-sigalg <서명 알고리즘>] [-dname <대상 이름>]
[-validity <유효일>] [-keypass <키 암호>]
[-keystore <keystore>] [-storepass <암호 입력>]
[-storetype <입력 유형>] [-providerName <이름>]
[-providerClass <공급자 클래스 이름> [-providerArg <인자>]] ...
-help
-identitydb [-v] [-protected]
[-file <신원 데이터베이스 파일>]
[-keystore <keystore>] [-storepass <암호 입력>]
[-storetype <입력 유형>] [-providerName <이름>]
[-providerClass <공급자 클래스 이름> [-providerArg <인자>]] ...
-import [-v] [-noprompt] [-trustcacerts] [-protected]
[-alias <별명>]
[-file <인증서 파일>] [-keypass <키 암호>]
[-keystore <keystore>] [-storepass <암호 입력>]
[-storetype <입력 유형>] [-providerName <이름>]
[-providerClass <공급자 클래스 이름> [-providerArg <인자>]] ...
-keyclone [-v] [-protected]
[-alias <별명>] -dest <대상 별명>
[-keypass <키 암호>] [-new <새 키 암호>]
[-keystore <keystore>] [-storepass <암호 입력>]
[-storetype <입력 유형>] [-providerName <이름>]
[-providerClass <공급자 클래스 이름> [-providerArg <인자>]] ...
-keypasswd [-v] [-alias <별명>]
[-keypass <기존 키 암호>] [-new <새 키 암호>]
[-keystore <keystore>] [-storepass <암호 입력>]
[-storetype <입력 유형>] [-providerName <이름>]
[-providerClass <공급자 클래스 이름> [-providerArg <인자>]] ...
-list [-v | -rfc] [-protected]
[-alias <별명>]
[-keystore <keystore>] [-storepass <암호 입력>]
[-storetype <입력 유형>] [-providerName <이름>]
[-providerClass <공급자 클래스 이름> [-providerArg <인자>]] ...
-printcert [-v] [-file <인증서 파일>]
-selfcert [-v] [-protected]
[-alias <별명>]
[-dname <대상 이름>] [-validity <유효일>]
[-keypass <키 암호>] [-sigalg <서명 알고리즘>]
[-keystore <keystore>] [-storepass <암호 입력>]
[-storetype <입력 유형>] [-providerName <이름>]
[-providerClass <공급자 클래스 이름> [-providerArg <인자>]] ...
-storepasswd [-v] [-new <새 암호 입력>]
[-keystore <keystore>] [-storepass <암호 입력>]
[-storetype <입력 유형>] [-providerName <이름>]
[-providerClass <공급자 클래스 이름> [-providerArg <인자>]] ...
| Postgres & mediawiki (0) | 2010.01.11 |
|---|---|
| Tomcat Admin App Deploy (0) | 2009.03.31 |
| 체스와 포커의 차이 (0) | 2009.03.25 |
| test (0) | 2008.09.17 |
| [펌]펀드, 분산투자의 마법 (0) | 2007.11.26 |
archidream's Blog is powered by Daum